
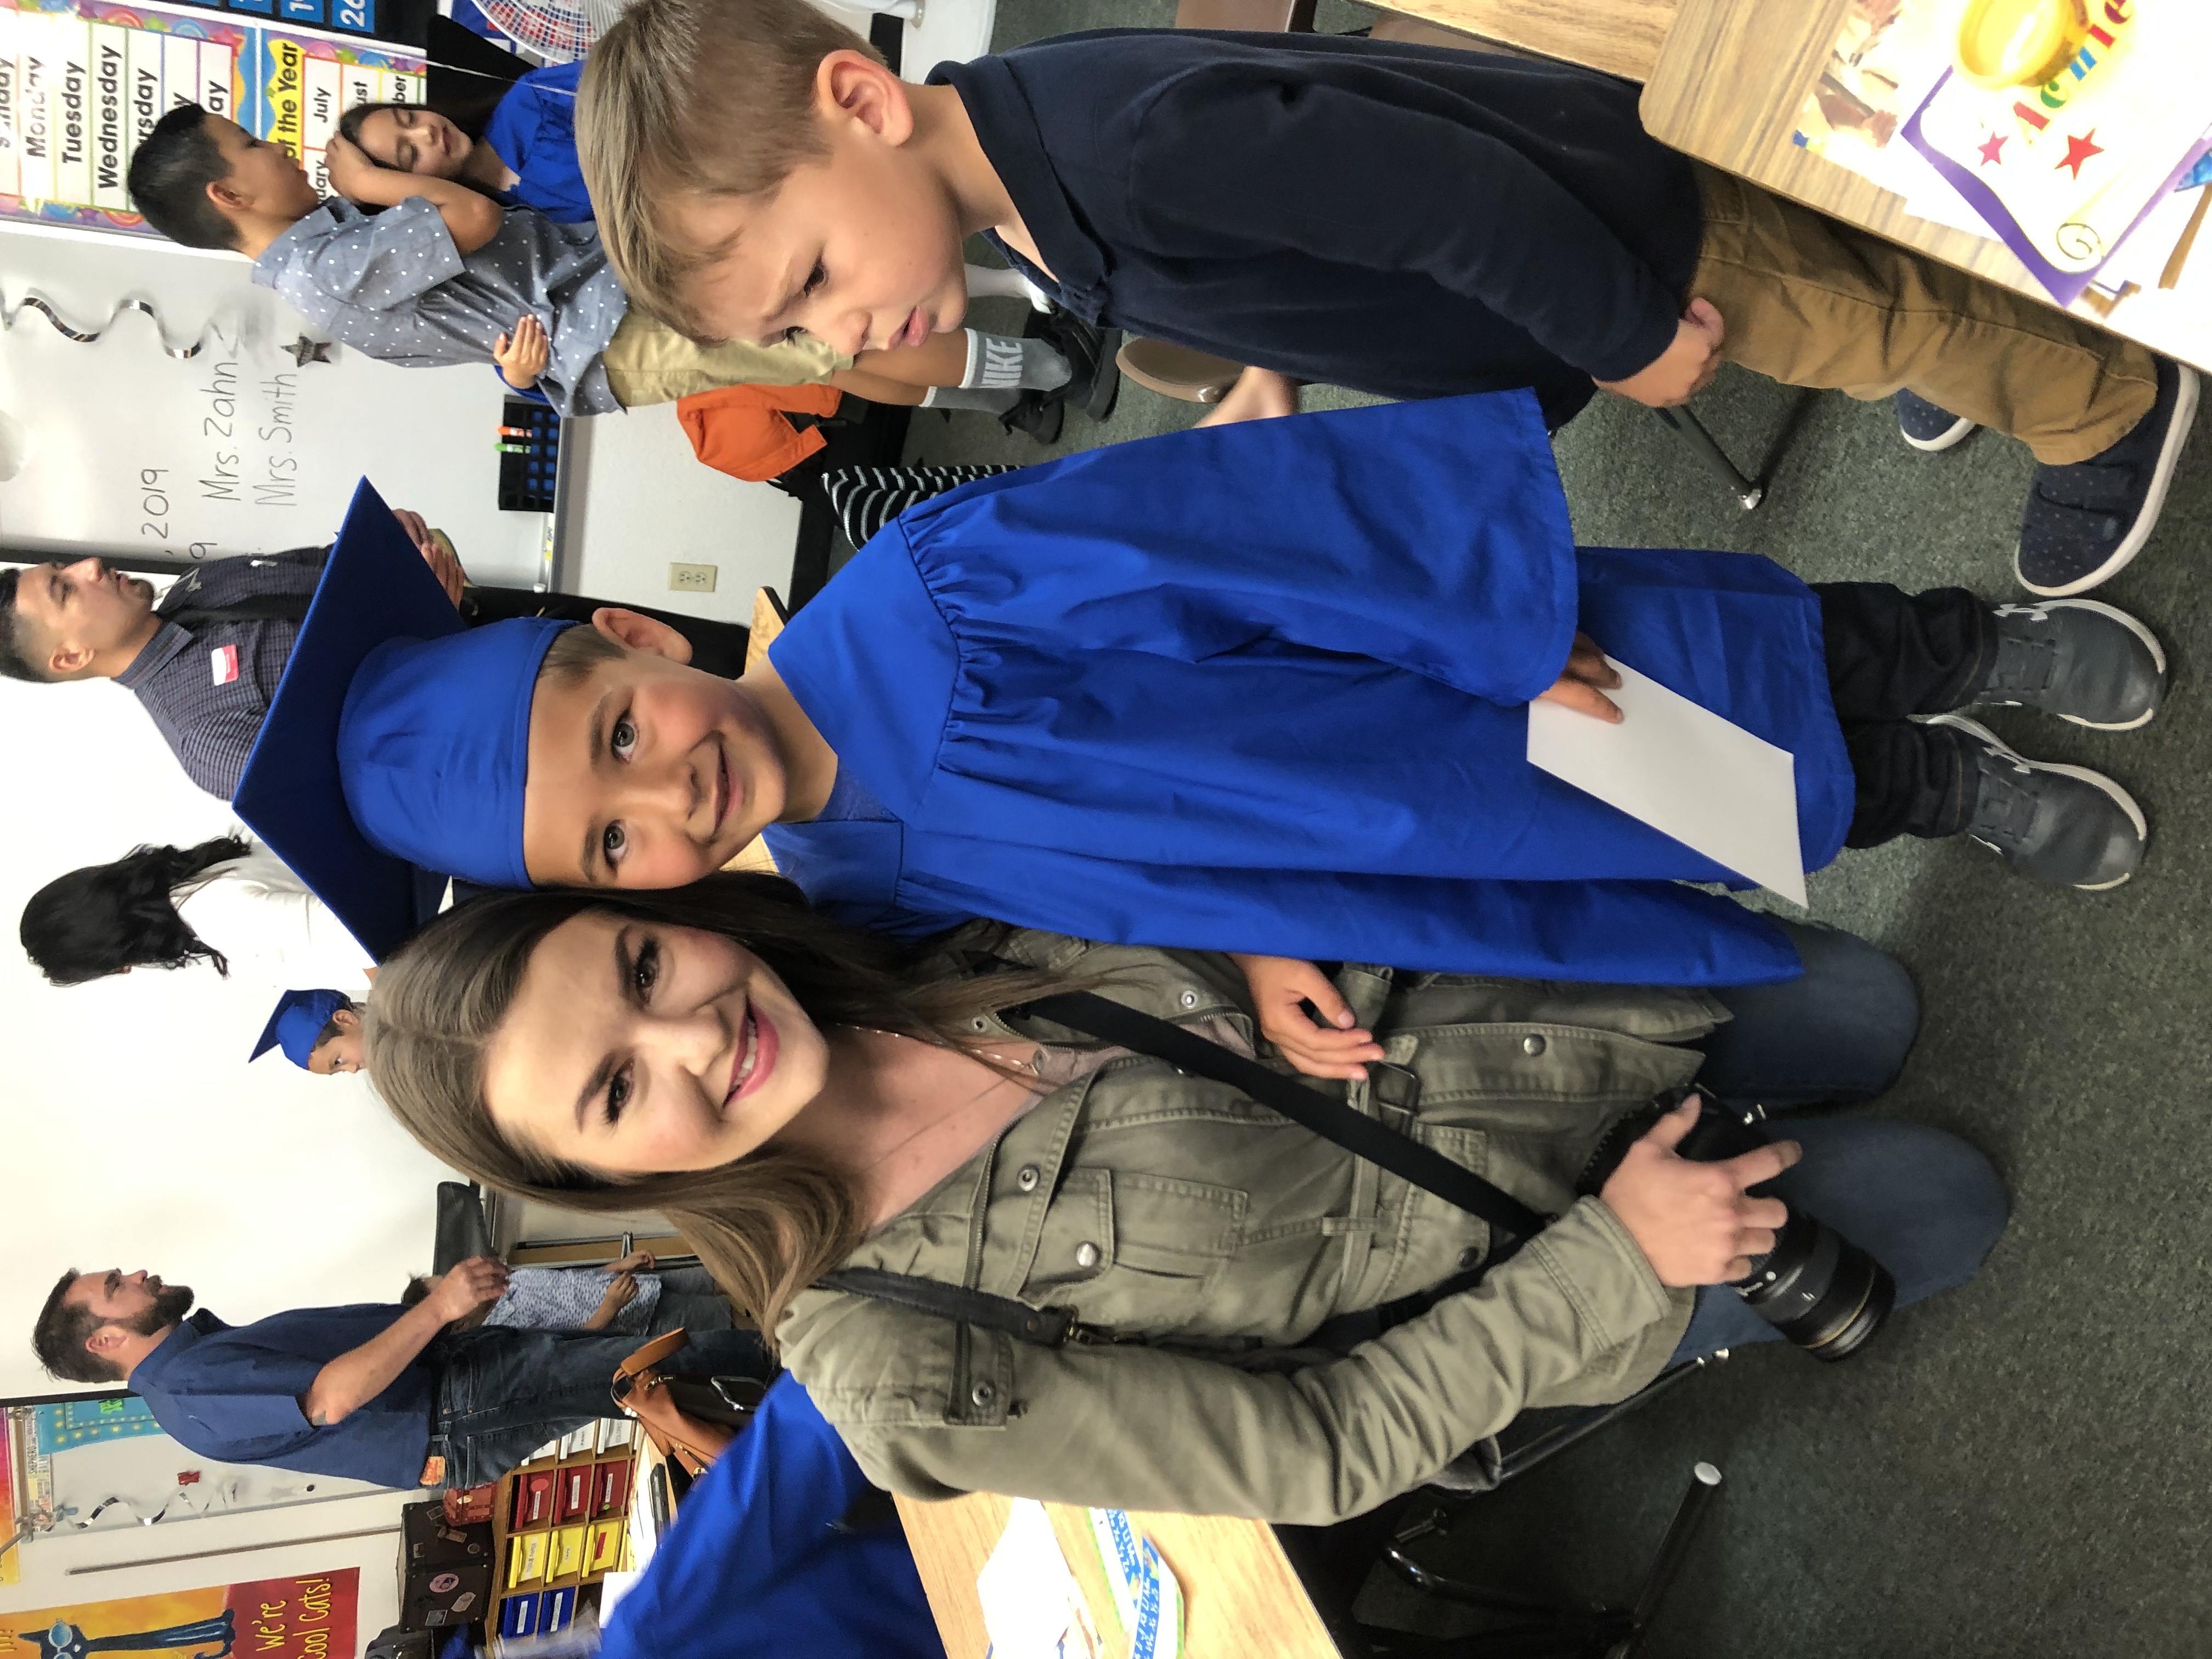
Sweet Bradley had it in his mind that we should for sure have a cake to celebrate his graduation, and he wished it could be vanilla, not chocolate like the last two we’ve made 😏 I love baking but don’t do it as much anymore. When I DO, I want to make things with healthier ingredients so I feel good about eating them myself and about serving them to the kids. They get enough standard sugary treats in their lives, I like being able to make healthier ones at home most of the time!
Enter the Sweet Laurel cookbook. TO. DIE. FOR. chocolate cake and dark chocolate fudge frosting I’ve made twice now and thought both times: WOW. Grain free, whole food recipes with few ingredients . . . right up my ally, especially in the first few months of this year when I was trying to heal my skin naturally, I was all-the-things free: grain, gluten, dairy, lectin, soy, refined oil, and later even egg free (that was one of the hardest!). This cookbook let me accomplish that goal of celebrating and baking and not feeling left out.
I didn’t even want to try a different cake/frosting recipe from the cookbook because the chocolate was SO incredible, but per Bradley’s request, I found the vanilla cake recipe and a coconut buttercream to go with it and got to it.
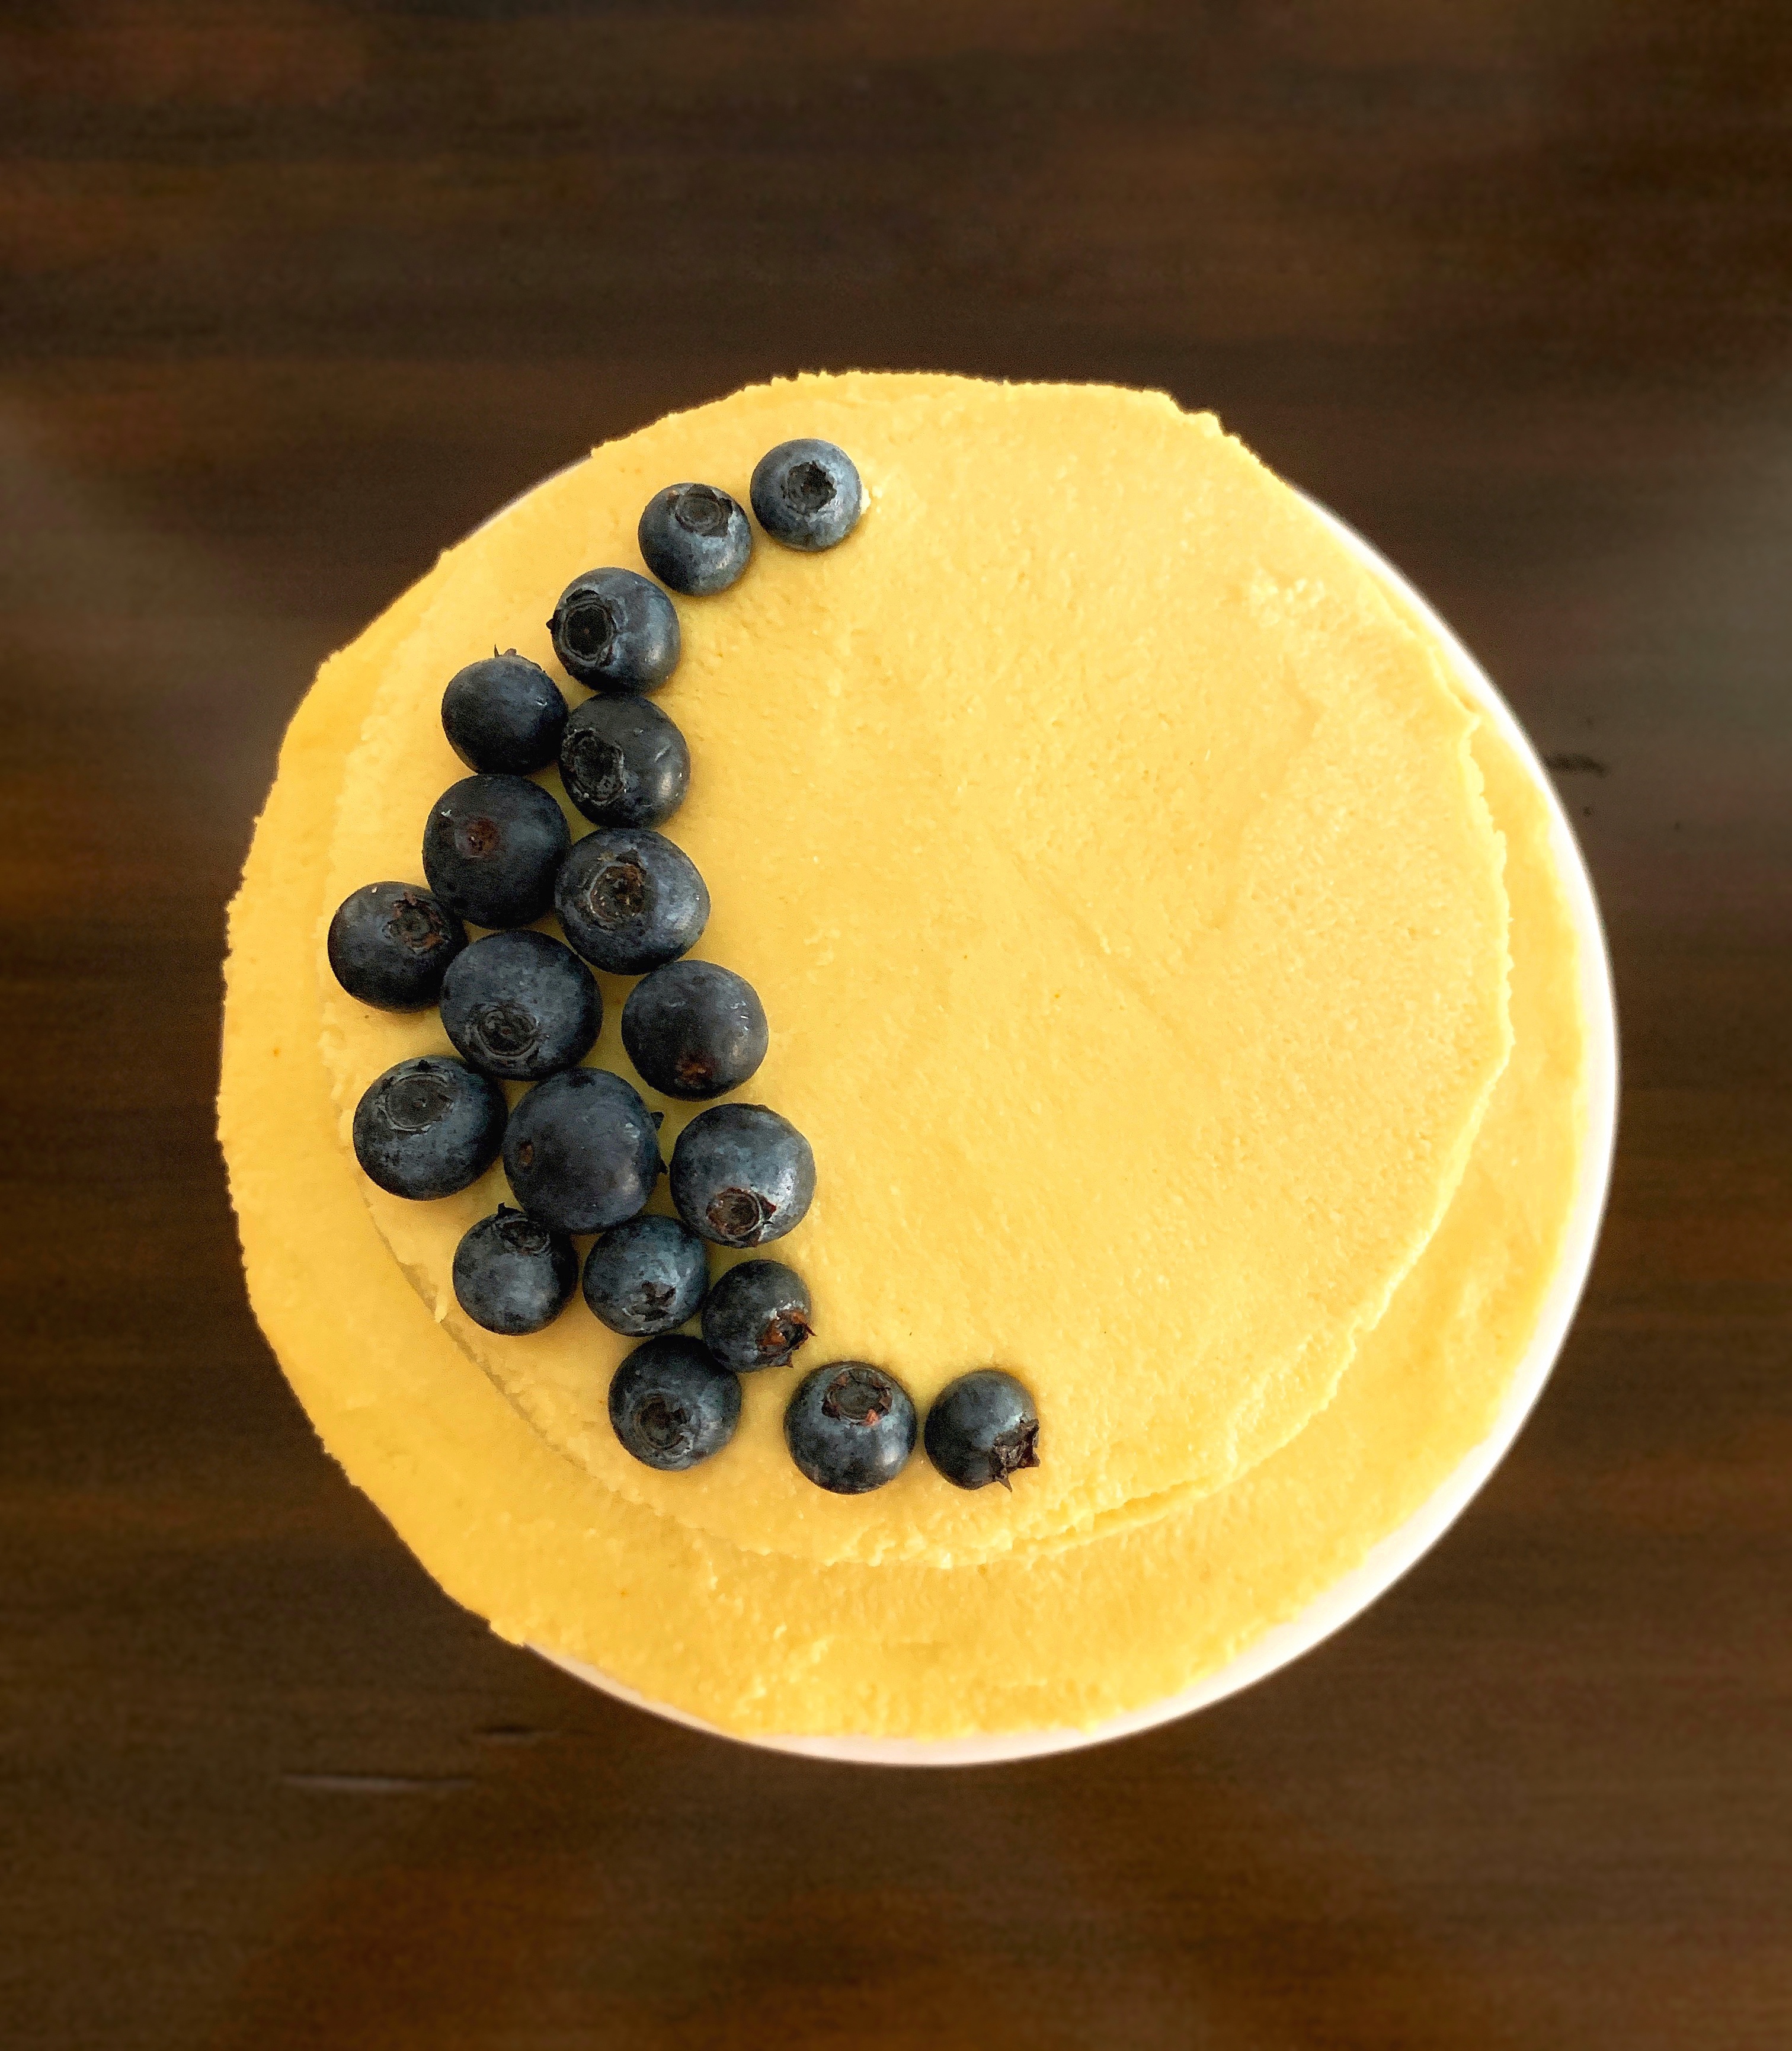
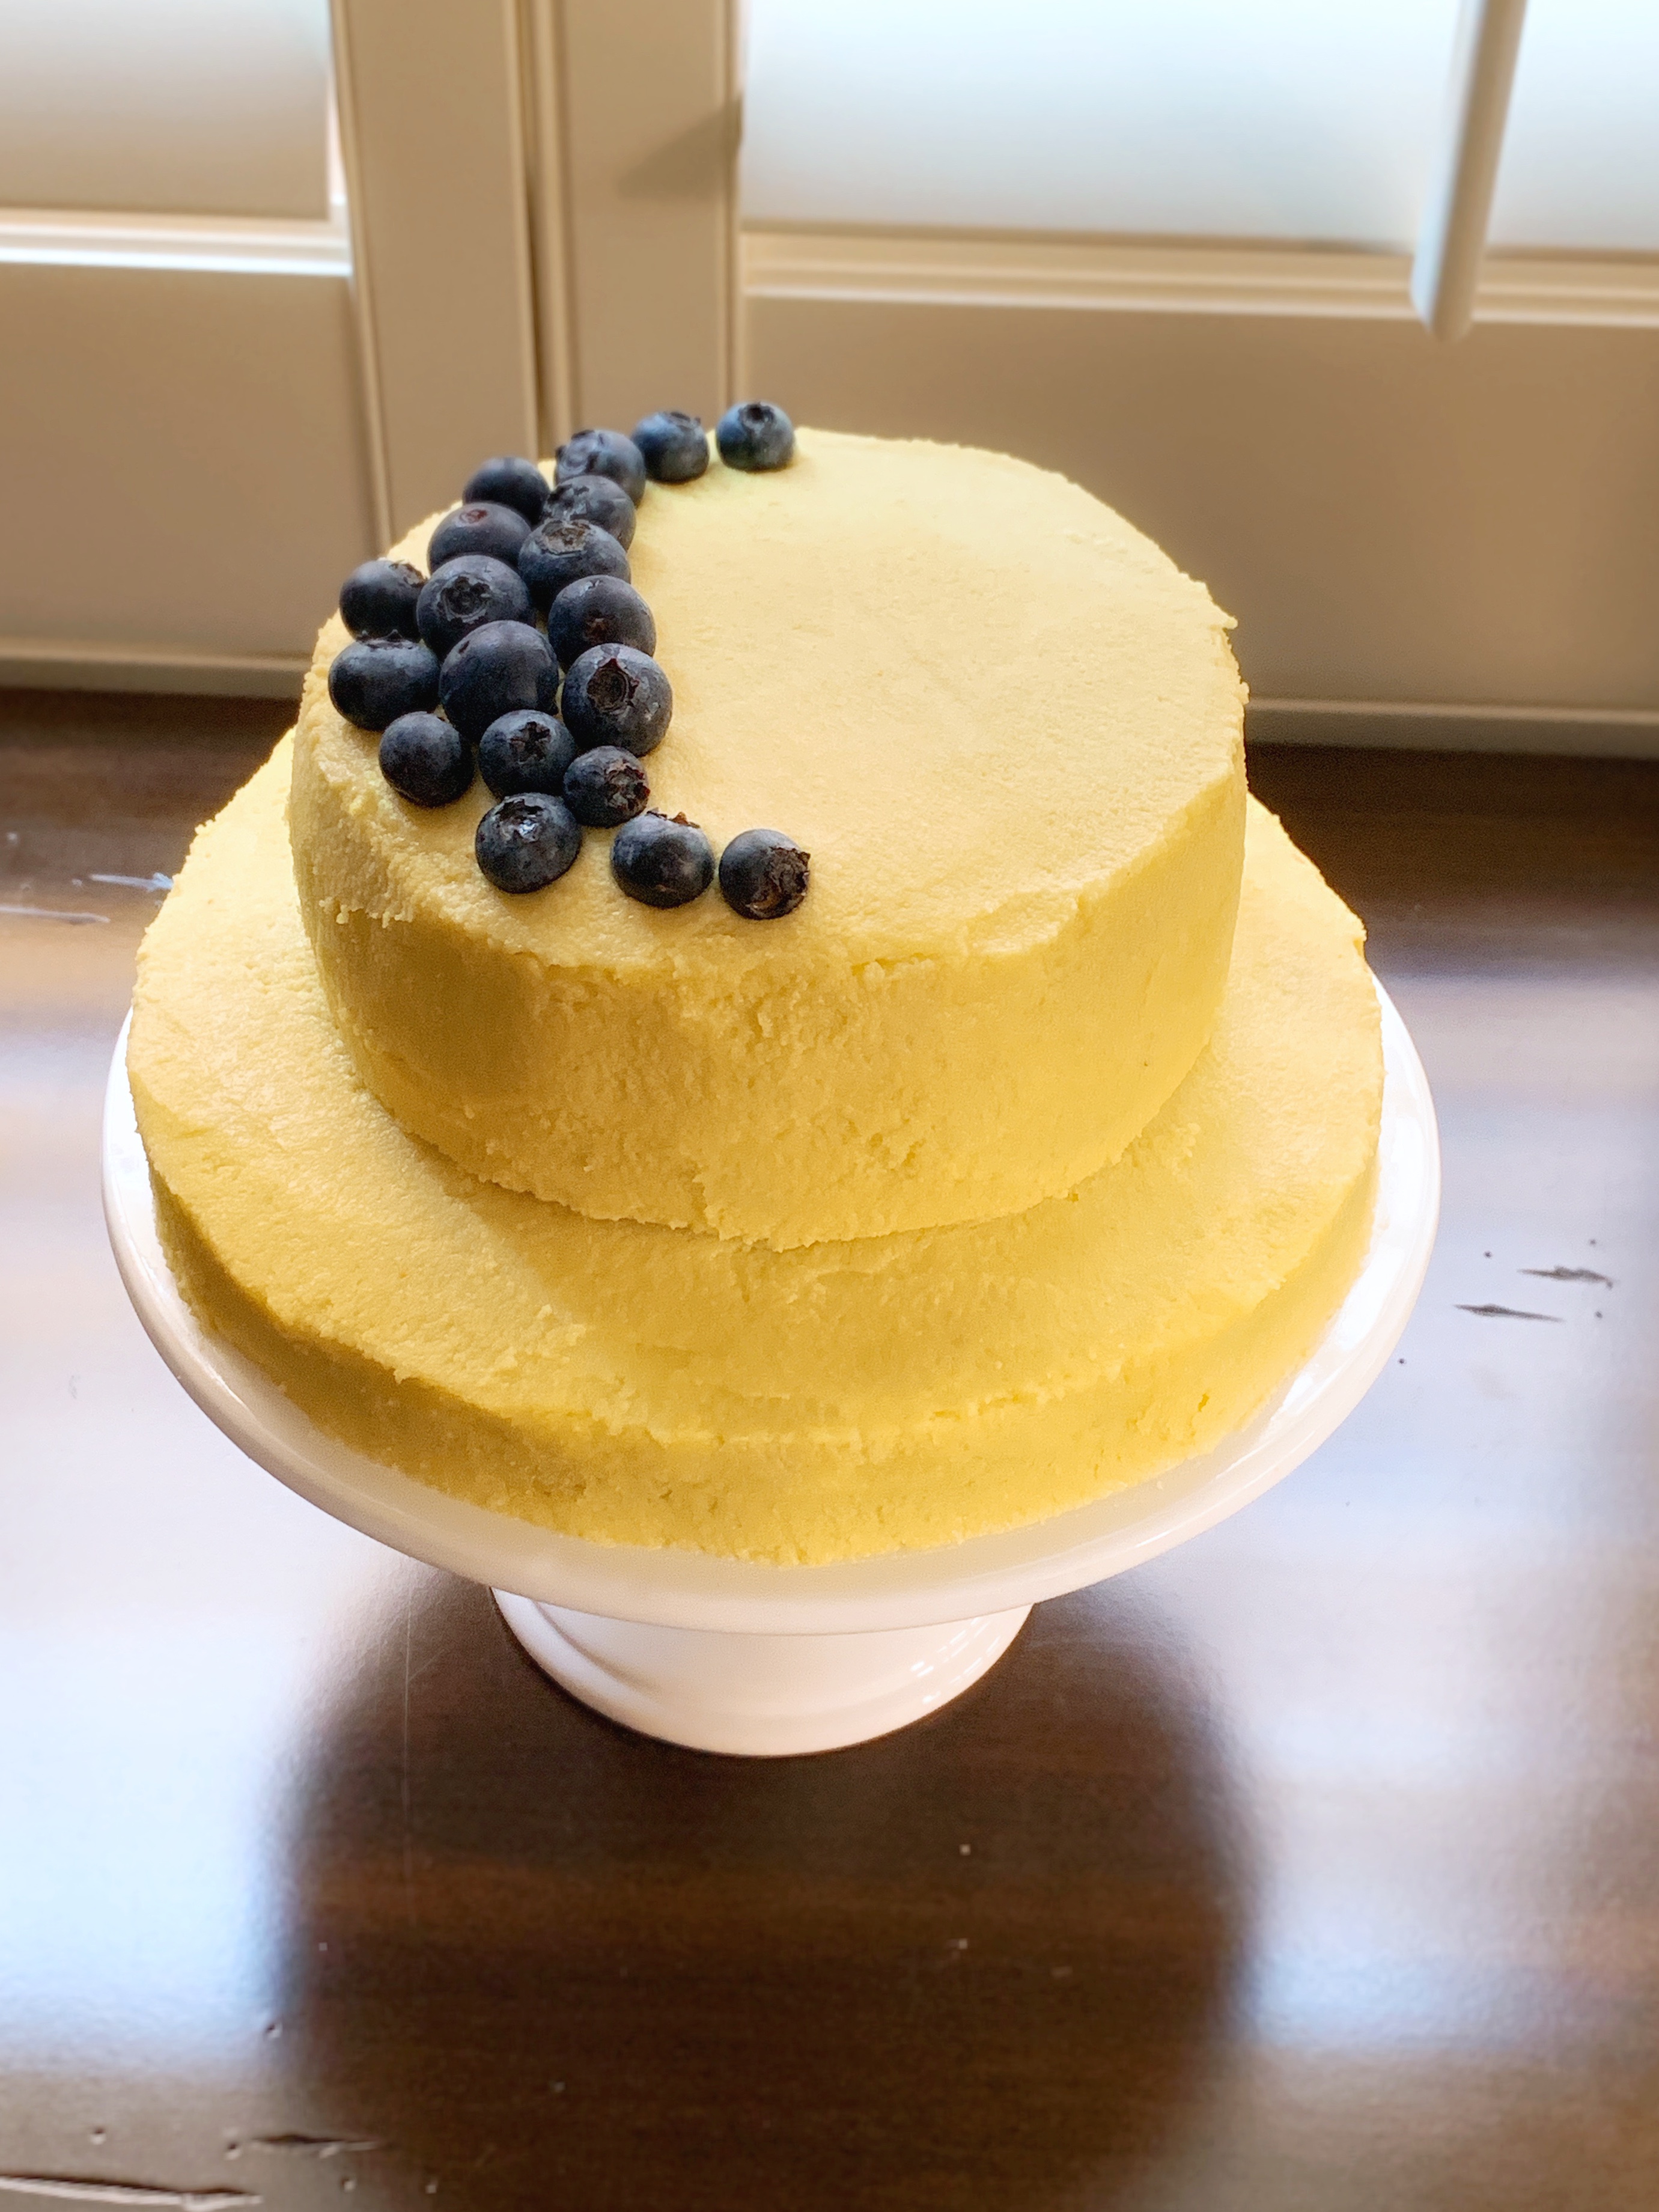
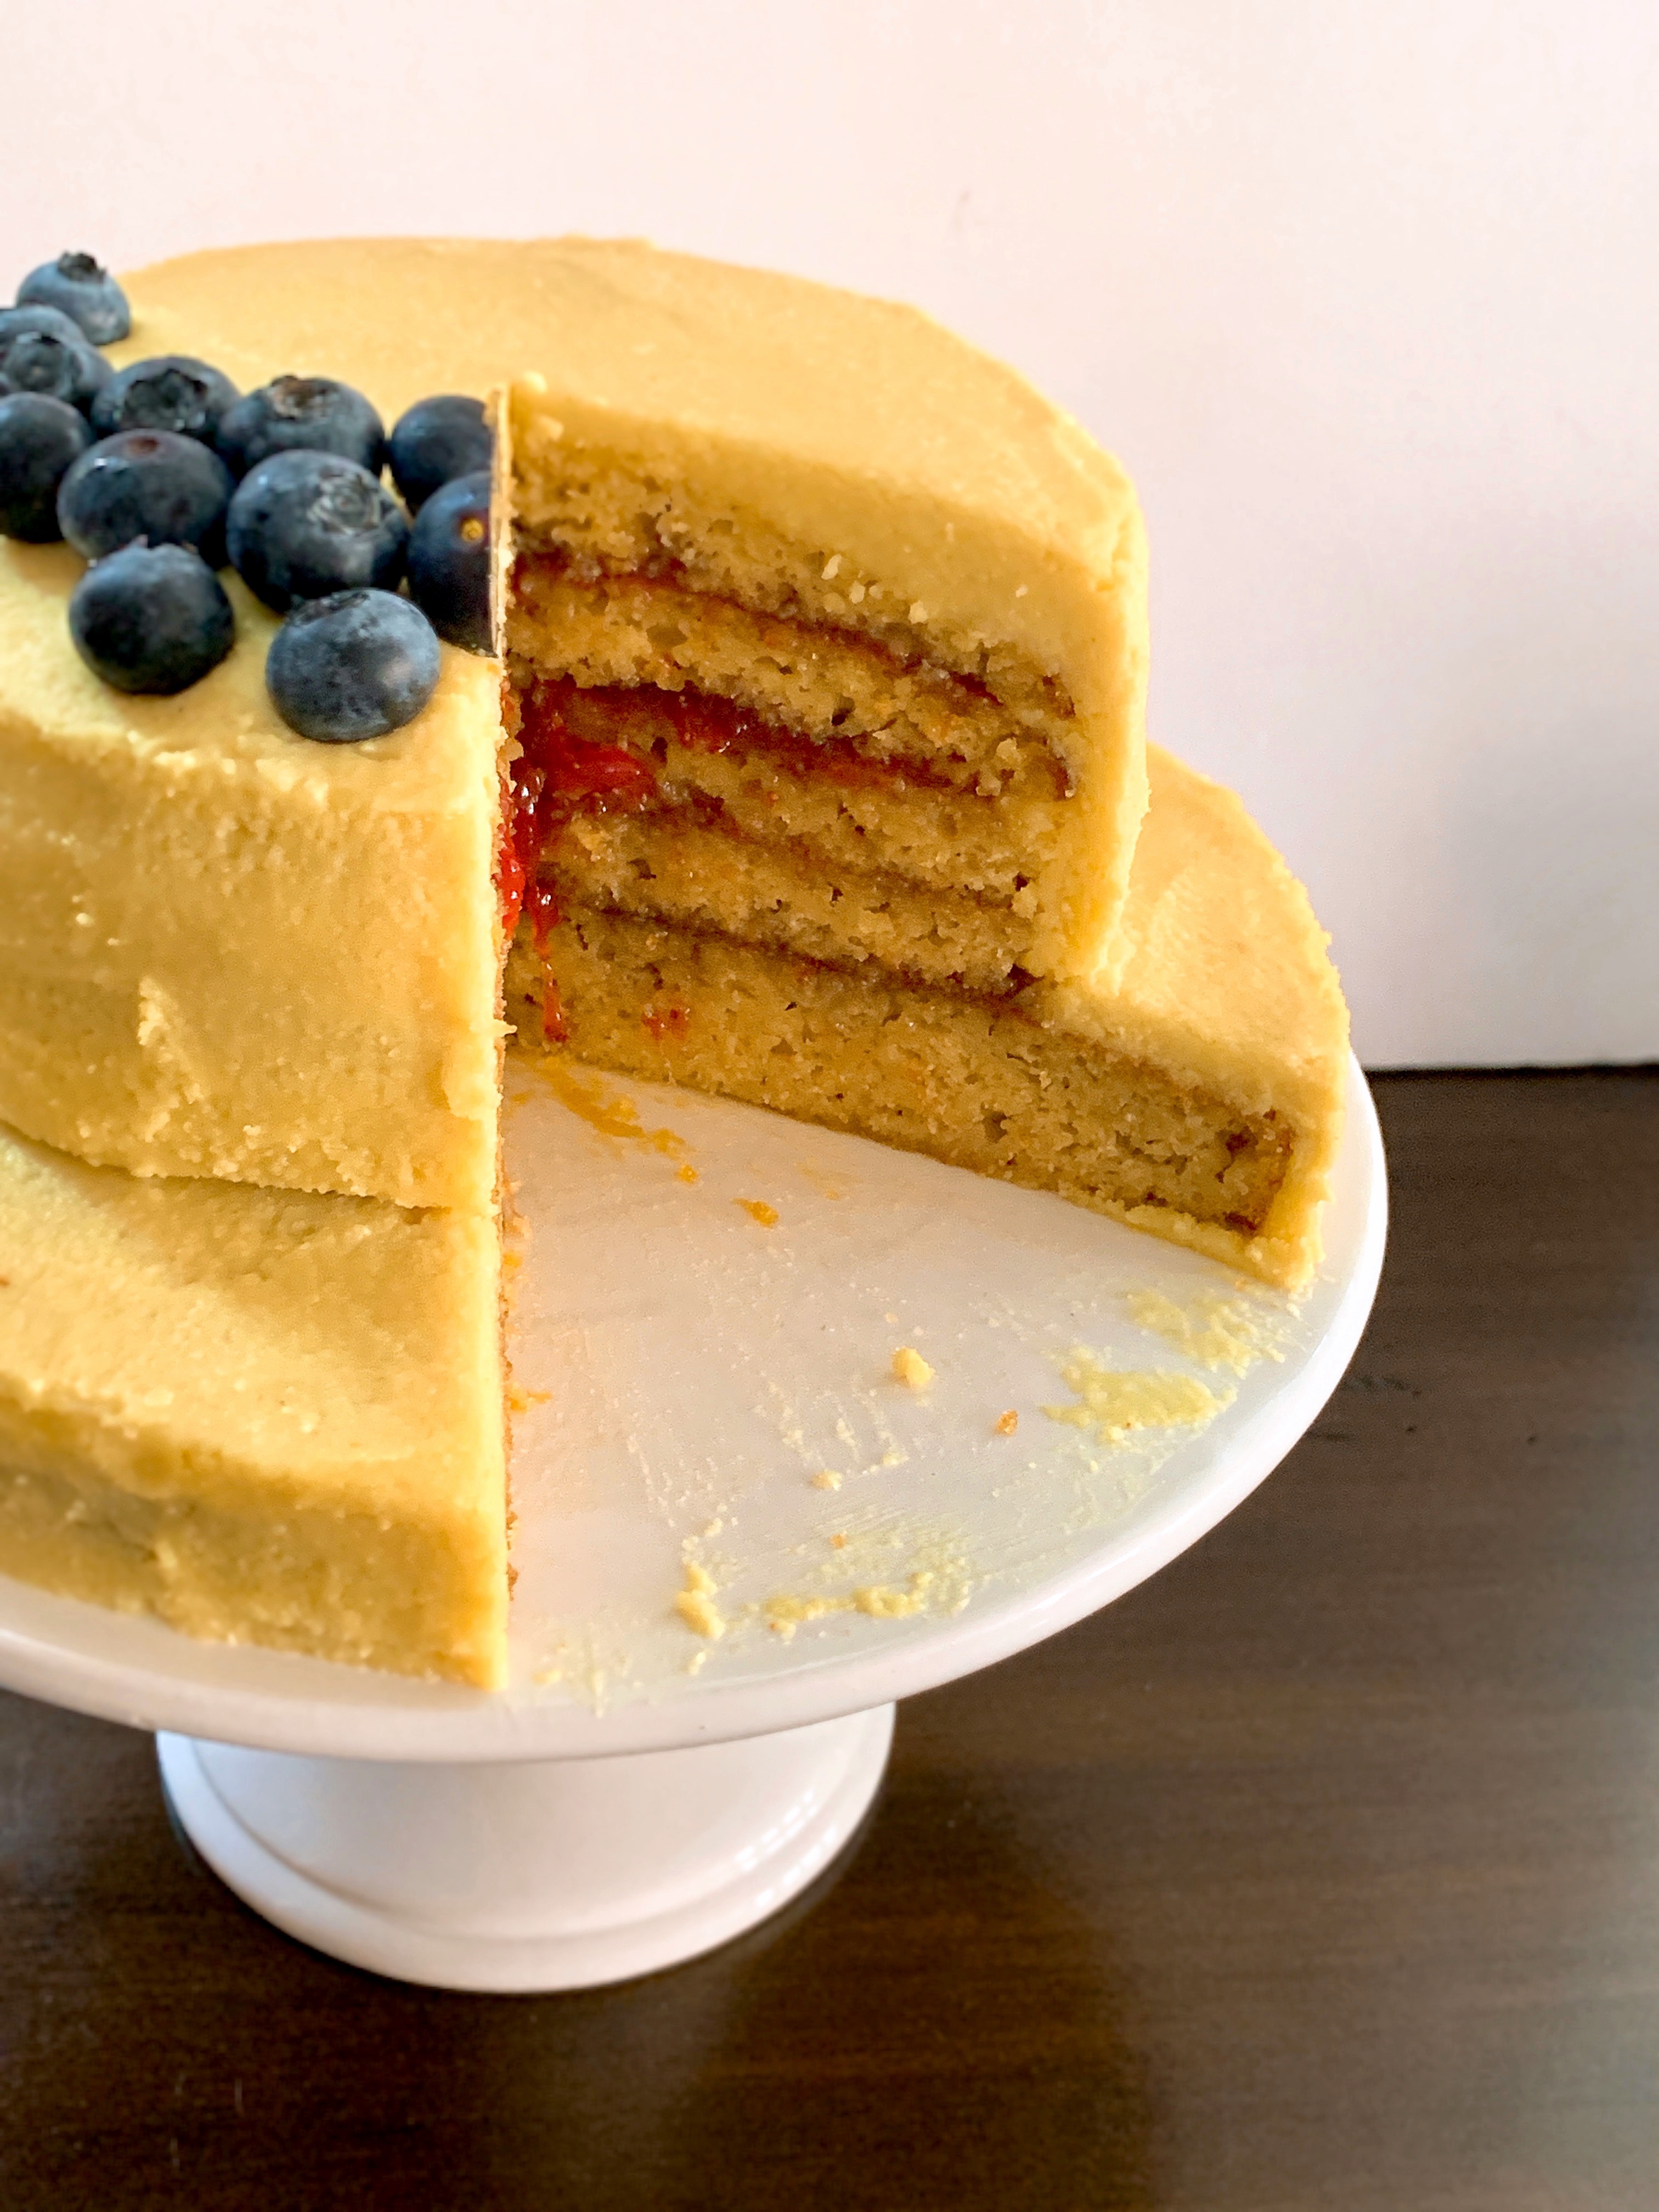
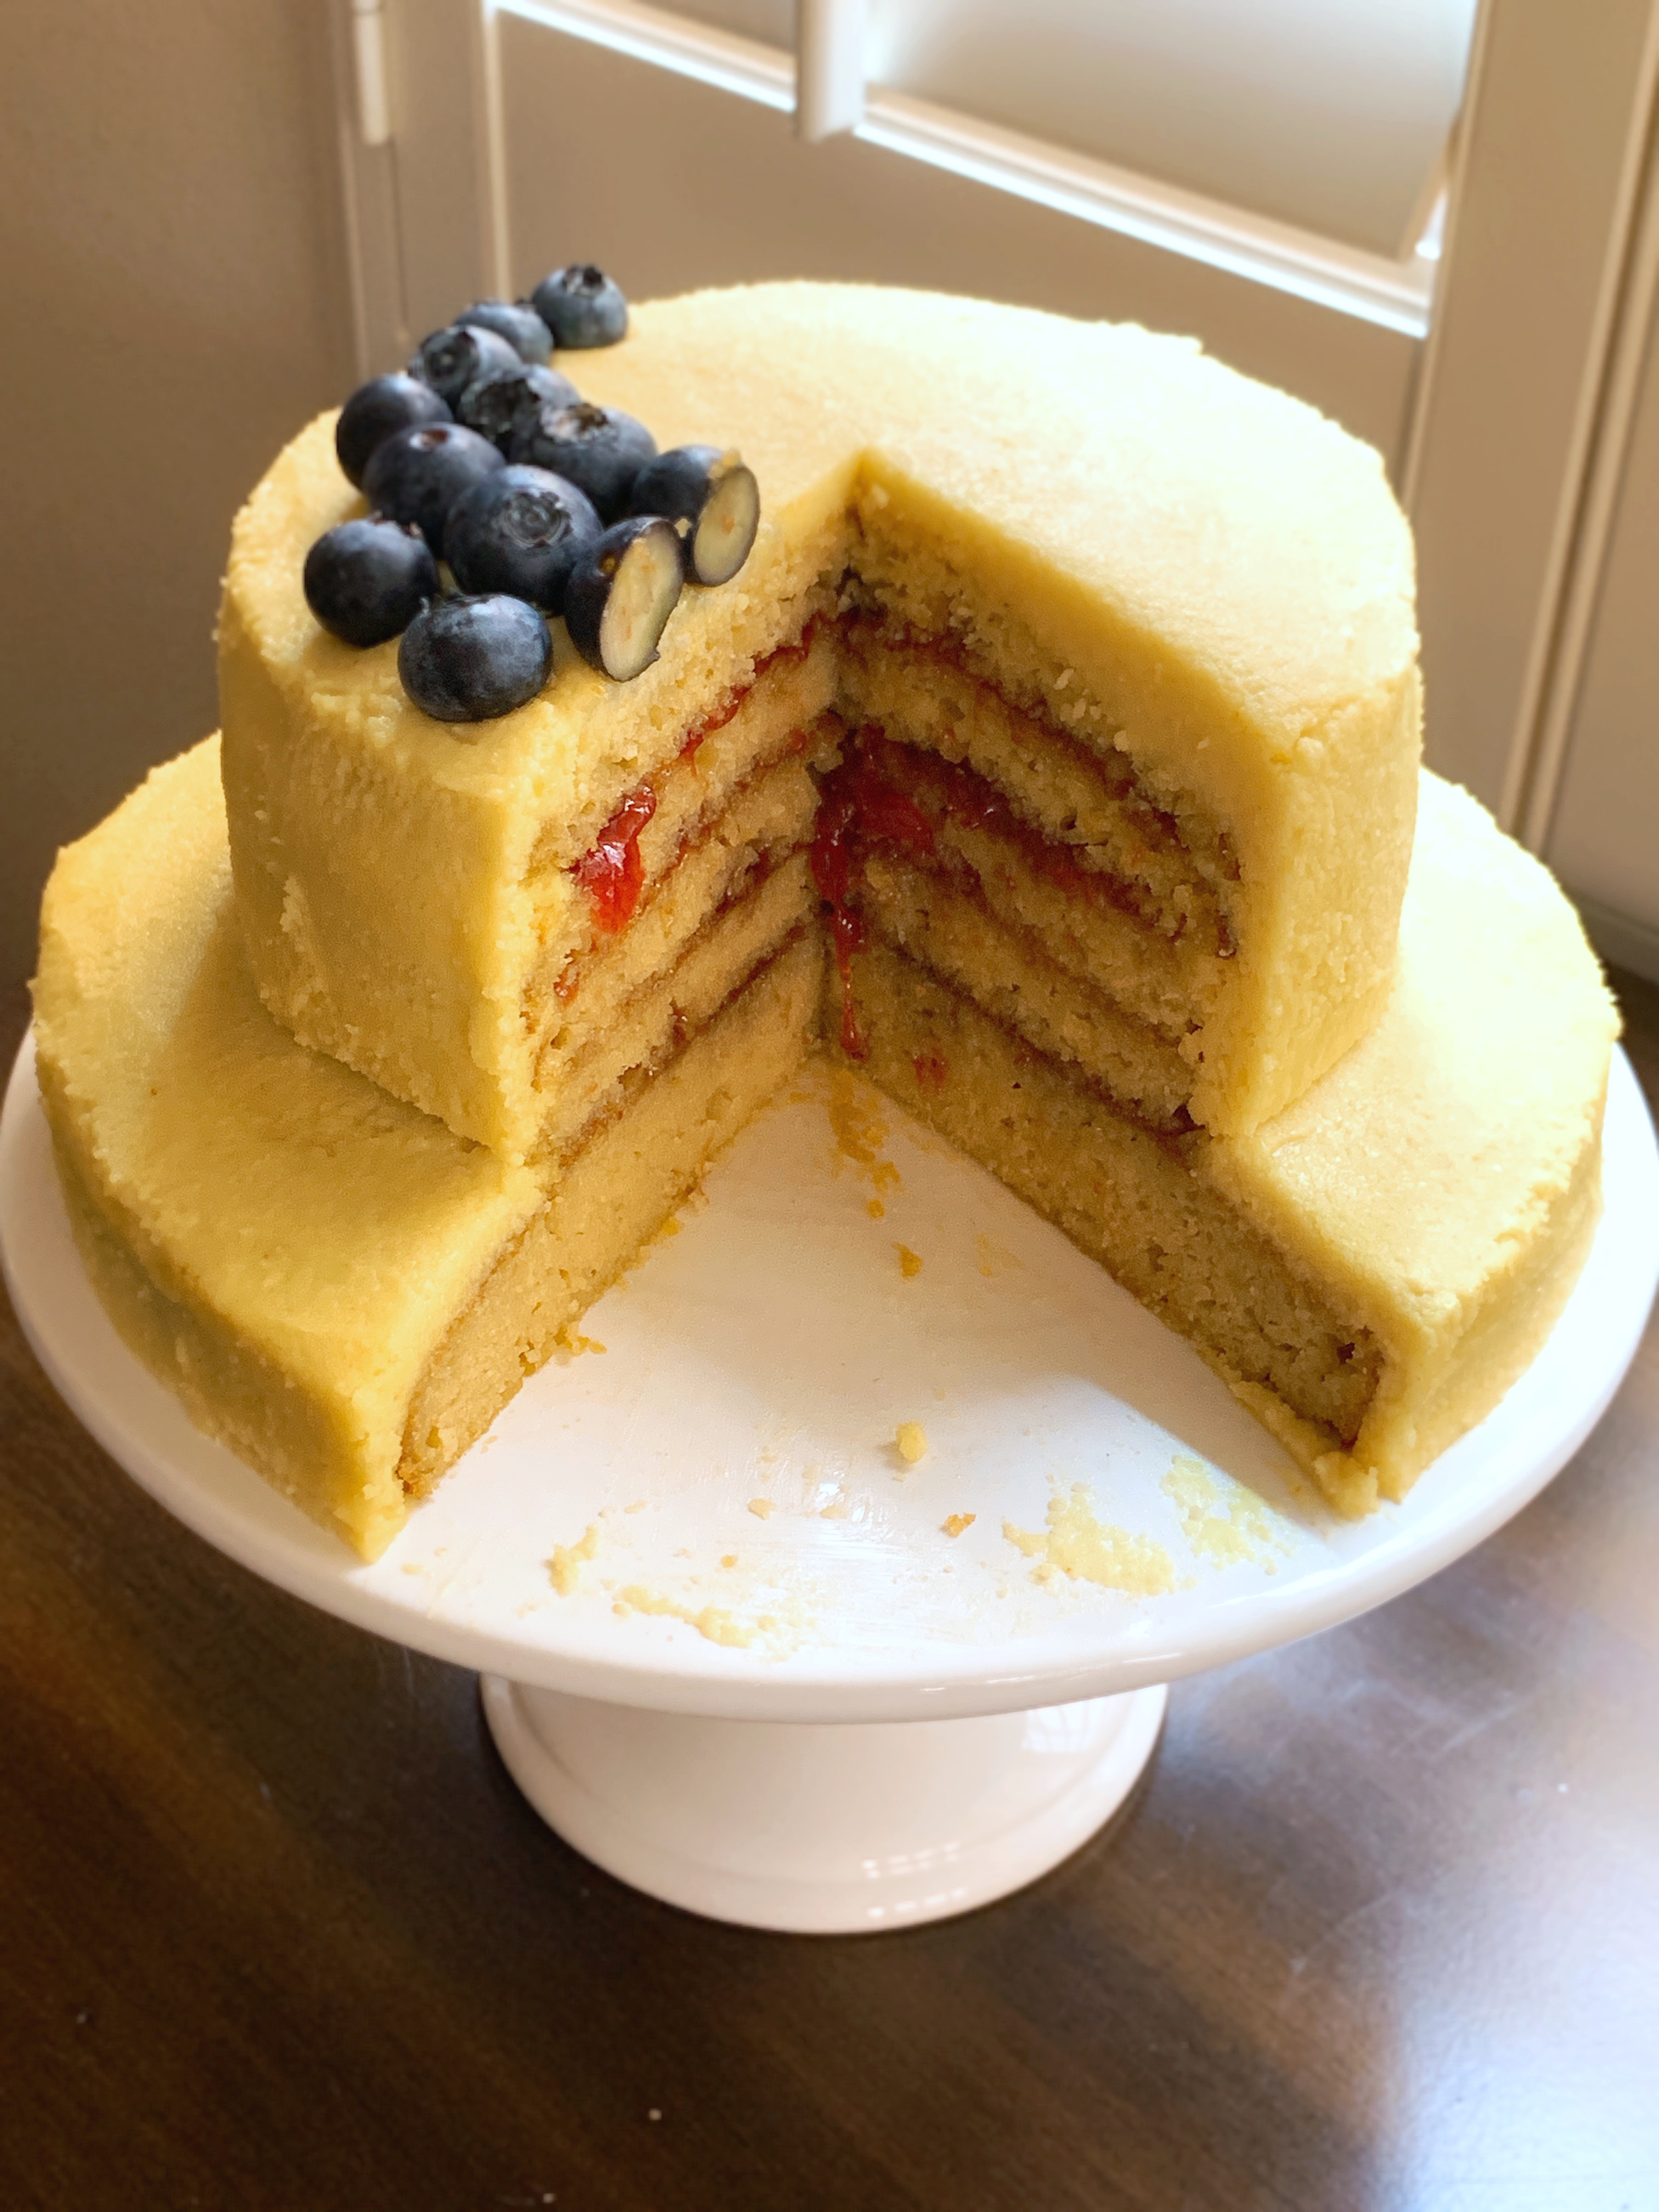
The result is what you see here! We did strawberry jam between the layers and tinted the icing yellow (without artificial coloring) just for kicks. The moon has no particular significance except that I thought it was a fun color combo to add the blueberries and we’re a space-loving family 🤗🌜🚀
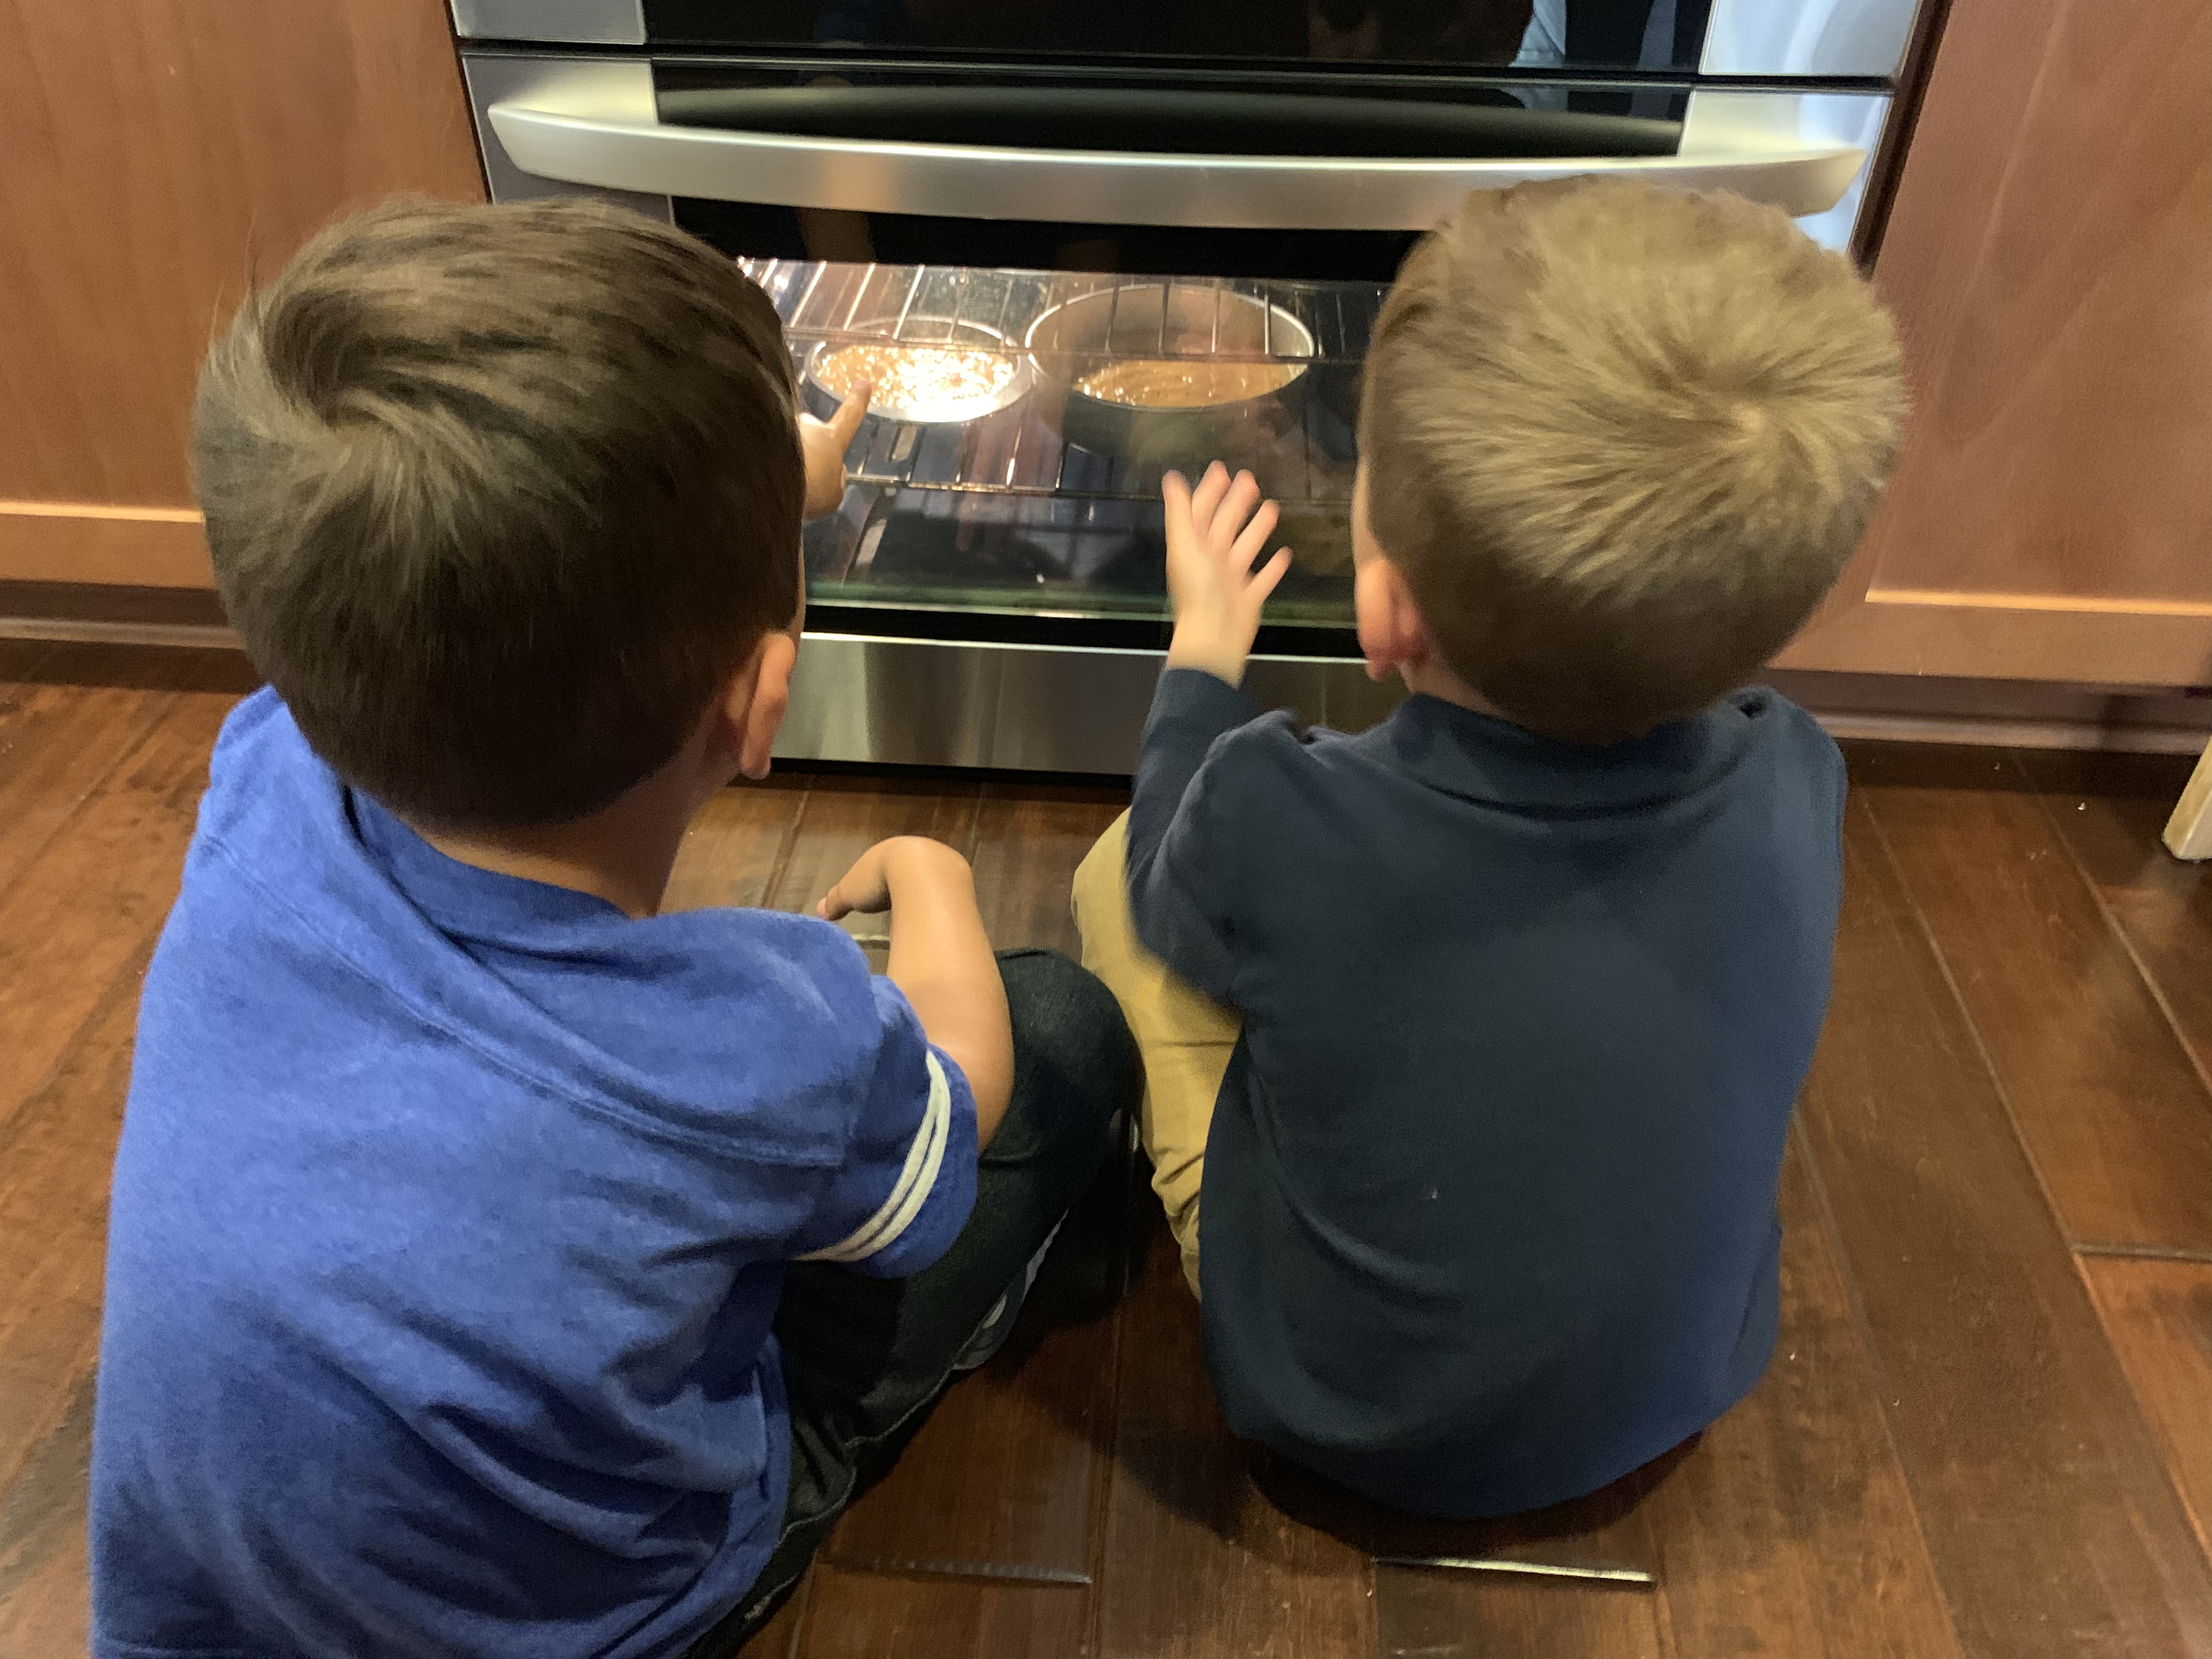
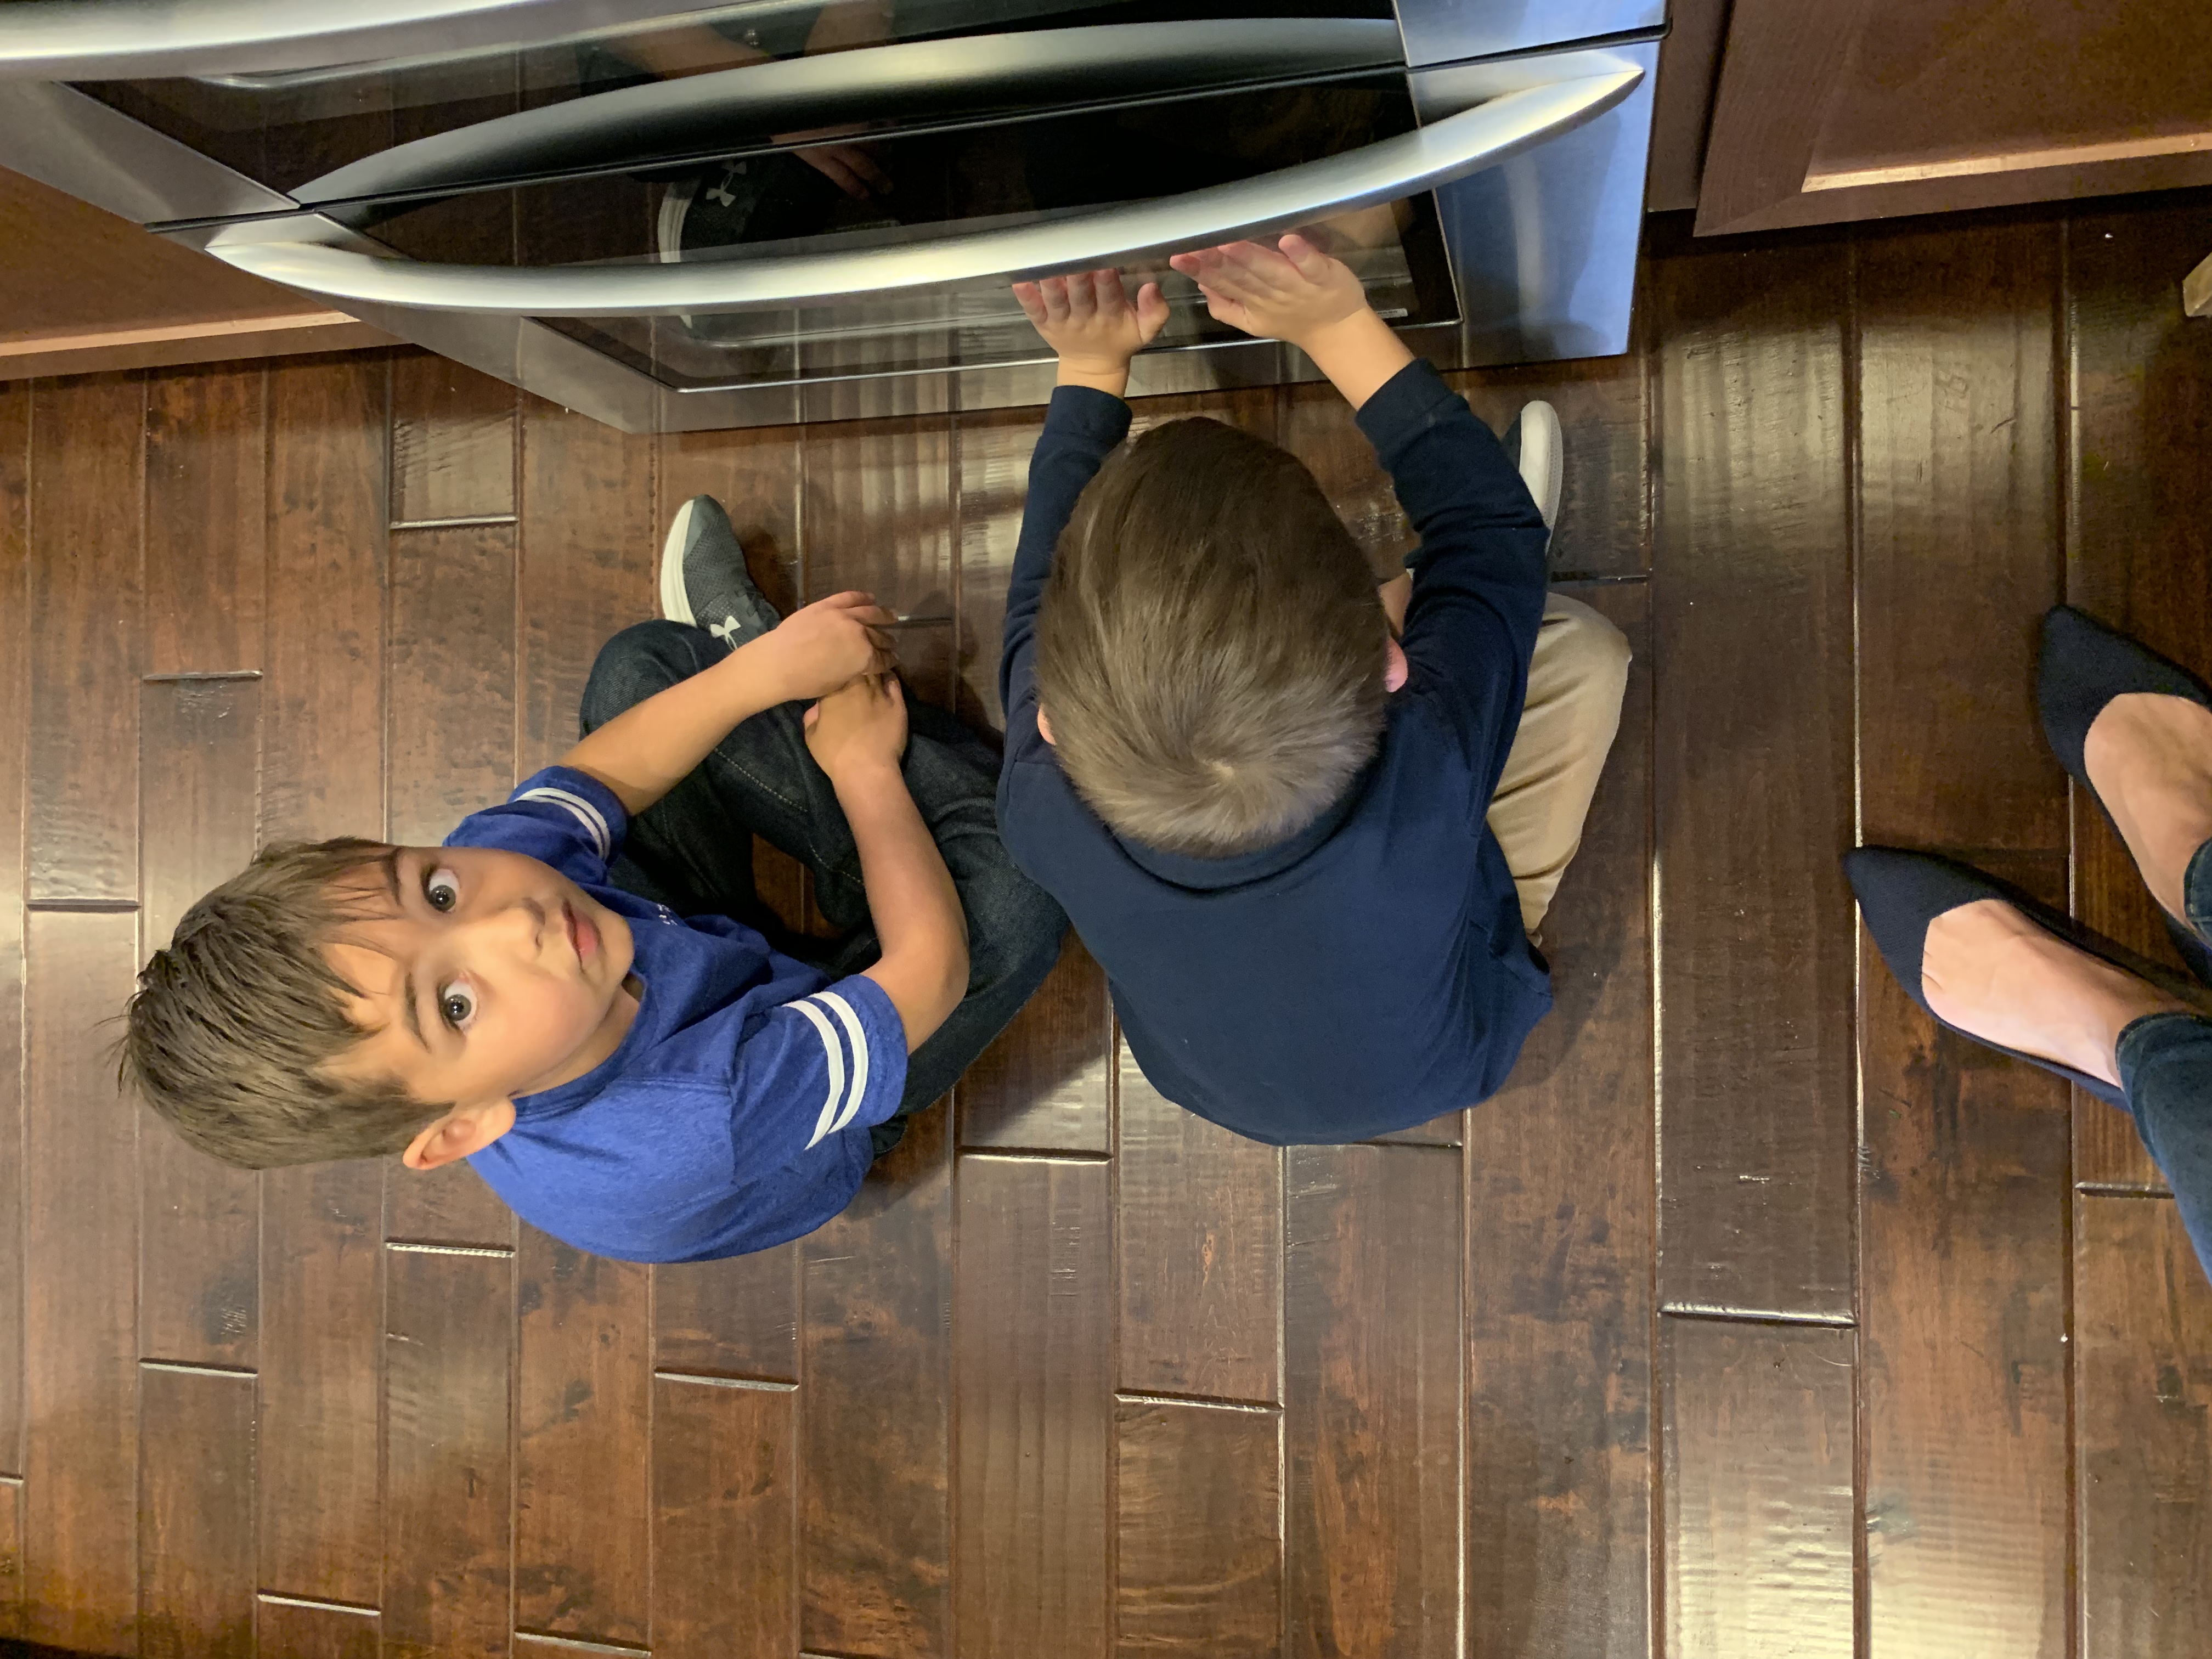
Bradley and Ethan liked the cake and filling more than the coconut buttercream. All the adults who tried it liked both. The buttercream consistency wasn’t as smooth as it probably could’ve been since I made my own “coconut butter” (one of the main ingredients) and our food processor is pretty basic. Also, in putting together this post I noticed that I used an incorrect ingredient in my buttercream: maple syrup instead of honey! That could definitely have affected things 😆 Nonetheless, it was a fun project that both kids helped me with, and now I know at least that the vanilla cake is a go (and I’m thinking that plus the dark chocolate fudge frosting for next time sounds pretty wonderful! 😍)
The ingredients are simple and can be found almost anywhere, possibly with the exception of coconut butter for the buttercream. It’s definitely sold at places like Whole Foods and natural grocers (Lassens if you’re local), or you can find it here.
Here’s the recipe:
Grain Free, Refined Sugar Free, Whole Food recipes adapted from Sweet Laurel Bakery cookbook for Vanilla Coconut Jam Cake and Coconut Buttercream.
- 1 cup coconut oil melted, plus more for greasing pans
- 1 cup coconut flour
- ½ tsp baking soda
- ½ tsp Himalayan pink salt
- 1 cup pure maple syrup
- 8 large eggs
- 1 TBSP vanilla extract
- 2 cups coconut butter or coconut manna
- 1/4 cup raw honey
- 1/2 cup full-fat coconut milk or almond milk
- 1 tsp vanilla extract
- 1/2 tsp turmeric powder for yellow coloring
-
Preheat the oven to 350º
-
Line three 6-inch cake pans or two 8-inch cake pans with parchment paper rounds then grease the sides of the pans with coconut oil (this step is very important or the cake WILL STICK! I cut my own parchment paper circles to fit my pans, and while it takes a few minutes, it's a must.)
-
In a large bowl, whisk the coconut flour, baking soda and salt together. In a separate large bowl, combine the coconut oil, maple syrup, eggs, and vanilla. A little at a time, add the dry ingredients to the wet, stirring until a batter forms. (Might want to let your maple syrup come to room temperature before mixing, or it'll make the coconut oil clump up in solid little bits due to the temp difference 🙃)
-
Divide the batter evenly among the prepared pans and bake for about 25 minutes, or until a toothpick inserted into the center comes out clean (time will be different for smaller cake pans as it was for us). Invert the cakes onto racks and allow to cool completely
-
Slice each cake round in half horizontally with a long serrated knife. Place one layer on a plate and top with filling of choice. Add another cake layer, and repeat. Continue until all layers have been used and top the final layer with buttercream, as well as the sides of the cake.
-
Place all the ingredients in a medium saucepan over very low heat. Gently whisk until the mixture is thick and creamy. If it's a little too creamy, add a bit more coconut milk.
-
If yellow icing is your goal: once you remove the pan from the heat, add 1/2 teaspoon turmeric powder (which, BONUS: has anti inflammatory properties!) and whisk.
The buttercream variations work best at room temperature when used immediately after making the frosting and finishing your baked goods. If you need to make it ahead, refrigerate the buttercream for up to 4 days, then allow it to come to room temperature outside of the refrigerator before using as an icing or frosting.
The cake recipe as written calls for 6-inch or 8-inch layers that you halve yourself. I opted to use our Easy Layers pan set from Wilton to eliminate that step, and since this recipe makes a bit more batter, I added an extra, larger layer using another pan I had. The height of that cake wasn't something I wanted to halve, so that bottom layer is just a single. Highly recommend the Easy Layers pans, they've been really fun for the kids and me over the past few years!
An offset spatula is essential in icing cakes like these, I've found. If you don't yet have one, this is the kind I mean!
I’d love to hear if you try it what you think of it! And if you have any questions, always feel free to ask 😊
